


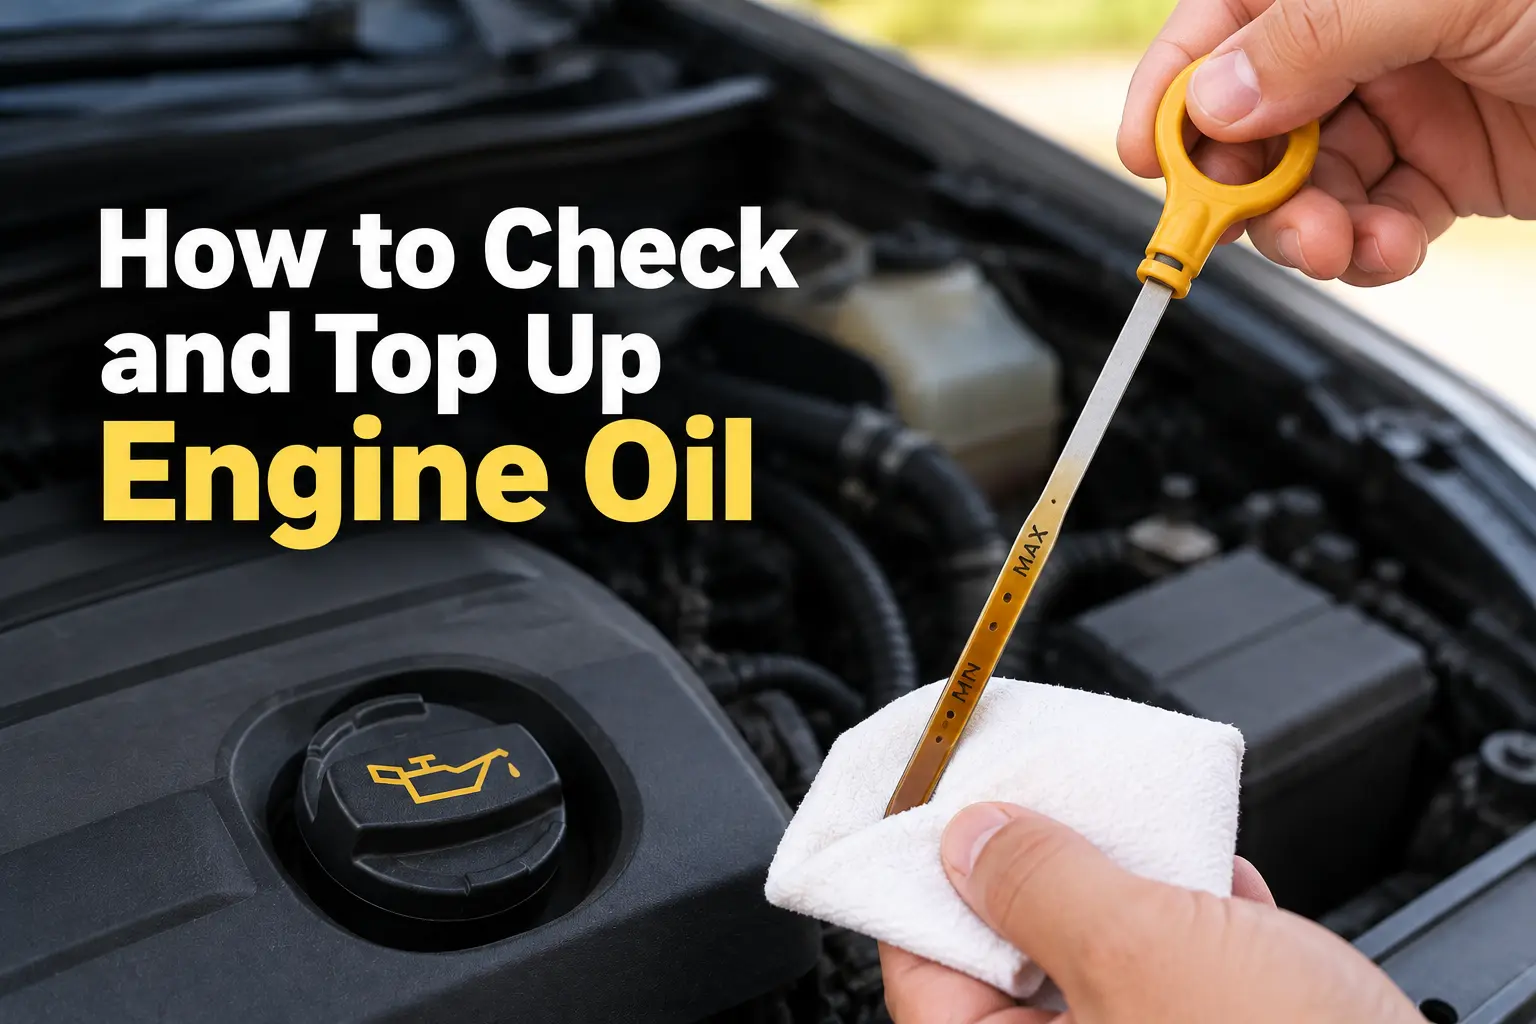
Engine oil is one of those things most car owners know they need to change, but far fewer regularly check themselves. That is a shame, because checking the oil level takes only a few minutes and can give you an early warning that something isn’t quite right with the engine.
The basic process is simple: park the car on level ground, allow the oil to settle according to the vehicle manufacturer’s procedure, check the dipstick and make sure the level sits within the specified range. If it is low, you can top it up with the correct engine oil in small amounts rather than simply pouring in a large quantity and hoping for the best. Manufacturer manuals from Hyundai and Maruti Suzuki give broadly similar guidance, while the exact checking procedure and oil specification can vary by engine.
For a DIY enthusiast, this is one of the easiest pieces of preventive maintenance to learn. More importantly, knowing how to check engine oil means you are less likely to discover a low-oil problem only after a warning light appears.
Why Checking Engine Oil Matters
Engine oil does much more than simply “lubricate the engine”. It helps reduce friction between moving components and also contributes to cooling, cleaning and corrosion protection. As the engine runs, oil can gradually be consumed or its condition can deteriorate, which is why manufacturers recommend regular inspection and servicing.
A low level does not necessarily mean that the engine has suffered a major failure. It could be related to normal consumption, a leak or other mechanical issues. But repeatedly finding that the level has dropped is something worth investigating rather than simply topping up indefinitely.
Regular checks can help you spot:
- A gradually falling oil level
- Possible oil leaks
- Excessive oil consumption
- Incorrect oil level after servicing
- Problems that may require professional inspection
The important point is that the dipstick is not just a maintenance tool. It is also a simple way of keeping an eye on what is happening inside your engine.
Read More: How to Jump Start a Car Safely: Step-by-Step DIY Guide
What You Need Before You Check Engine Oil
You don’t need a garage full of equipment for this job. In most cars with a conventional engine-oil dipstick, you need only a few basic items:
- A clean, lint-free cloth or paper towel
- The correct engine oil for your vehicle
- A small funnel, preferably
- Gloves if you want to keep your hands clean
- Your owner’s manual or the manufacturer’s recommended oil specification
The correct engine oil is particularly important. Do not choose an oil simply because its viscosity looks similar or because it is marketed for another vehicle. Check your owner’s manual for the required viscosity and specification before buying or adding oil. Hyundai’s current owner guidance, for example, explicitly instructs owners to use the specified engine oil.
When Should You Check Engine Oil?
The exact procedure varies between manufacturers and engines, so your owner’s manual should always take priority. Some manufacturers specify checking before starting the engine, while others instruct the owner to warm the engine, switch it off and wait several minutes so the oil can drain back into the sump. Maruti Suzuki, for example, specifies checking on level ground either before starting the engine or at least five minutes after stopping it, while Hyundai procedures commonly specify a warm engine followed by a waiting period.
For a typical dipstick check:
- Park on level ground.
- Secure the car properly with the parking brake.
- Follow the engine-specific instructions in your owner’s manual.
- If the procedure requires a warm engine, switch it off and allow the specified waiting period.
- Make sure you can safely reach the dipstick and filler cap without touching hot components.
Do not blindly apply one timing rule to every car. The correct procedure is the one specified for your particular engine.
How to Check Engine Oil Using the Dipstick
This is the heart of the DIY procedure, and it is surprisingly straightforward.
Step 1: Park the Car on Level Ground
The car needs to be on reasonably level ground because the oil level inside the sump can appear different if the vehicle is parked on a slope. Maruti Suzuki specifically warns that the indication may be inaccurate when the vehicle is on an incline.
Put the car in the appropriate parked position, apply the parking brake and follow your manufacturer’s instructions before opening the bonnet.
Step 2: Locate the Oil Dipstick
Open the bonnet and look for the engine oil dipstick. Its handle is often brightly coloured, but the design varies between manufacturers and engines.
If you aren’t sure which component is the dipstick, check the owner’s manual rather than pulling random caps or components in the engine bay.
Step 3: Pull Out the Dipstick
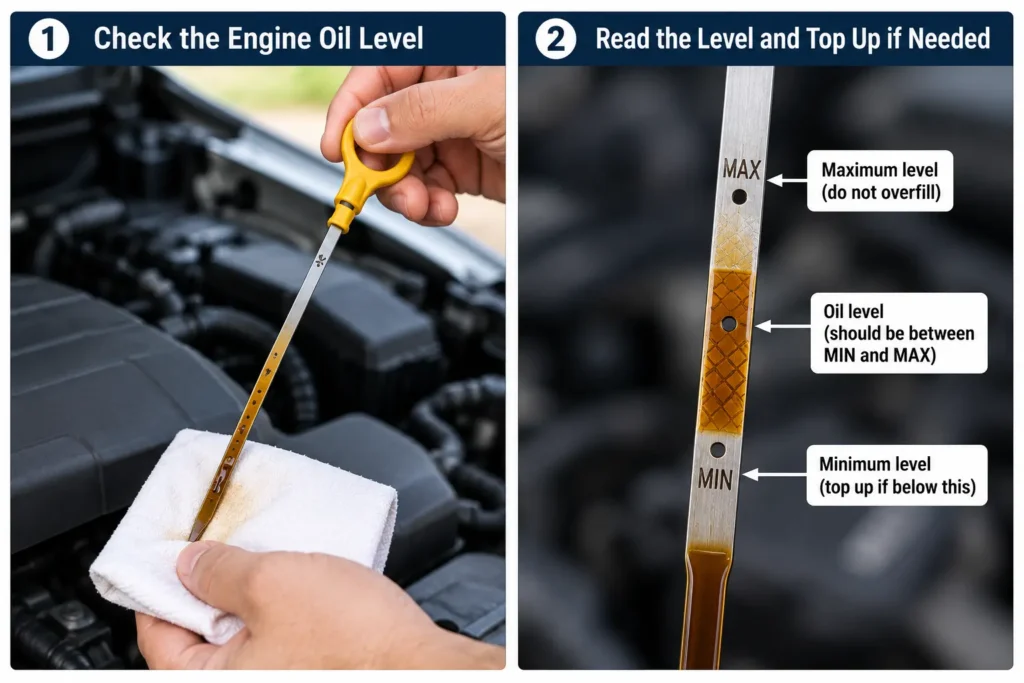
Remove the dipstick completely and wipe it clean with a lint-free cloth or clean paper towel.
At this point, you are not yet taking the final reading. The first removal is simply to clean the dipstick so that you can get an accurate measurement.
Step 4: Reinsert the Dipstick Fully
Push the clean dipstick all the way back into its tube. Make sure it is properly seated before removing it again.
This matters because an incompletely inserted dipstick can give you a misleading reading.
Step 5: Remove It and Read the Oil Level
Pull the dipstick out again and look at the marked section at its end.
Depending on the vehicle, you may see:
- MIN / MAX
- L / F
- Two dots or holes
- A cross-hatched area
- Another manufacturer-specific marking
The principle is the same: the oil should sit within the manufacturer’s specified operating range. Hyundai’s owner manuals, for example, commonly specify a level between F (Full) and L (Low).
If the reading is difficult to see because the oil has spread along the dipstick, wipe it clean and repeat the process. Looking at the stick in good light can also make the oil film much easier to identify.
How to Read the Engine Oil Level
Think of the marked section on the dipstick as a safe operating range rather than a simple “full or empty” indicator.
If the oil is between the markings
This generally means the level is within the specified range. There is no reason to add oil simply because the level isn’t sitting exactly at the upper mark.
If the oil is close to the lower mark
The appropriate action depends on the vehicle manufacturer’s instructions. Some manuals specify adding enough oil to bring the level toward the upper mark, while others use different marked ranges. Follow your owner’s manual rather than assuming every engine has the same acceptable range.
If the oil is below the lower mark
This indicates that additional oil is required according to the manufacturer’s procedure. Add the specified oil carefully and recheck the level.
If the oil is above the maximum mark
Do not assume that more oil is better. Overfilling can cause problems, and manufacturer manuals explicitly warn against it.
If you have significantly overfilled the engine, professional assistance may be the safest option rather than continuing to drive and hoping the excess oil causes no issue.
How to Top Up Engine Oil
Once you know the level is low, topping up is relatively simple — but this is where patience matters.
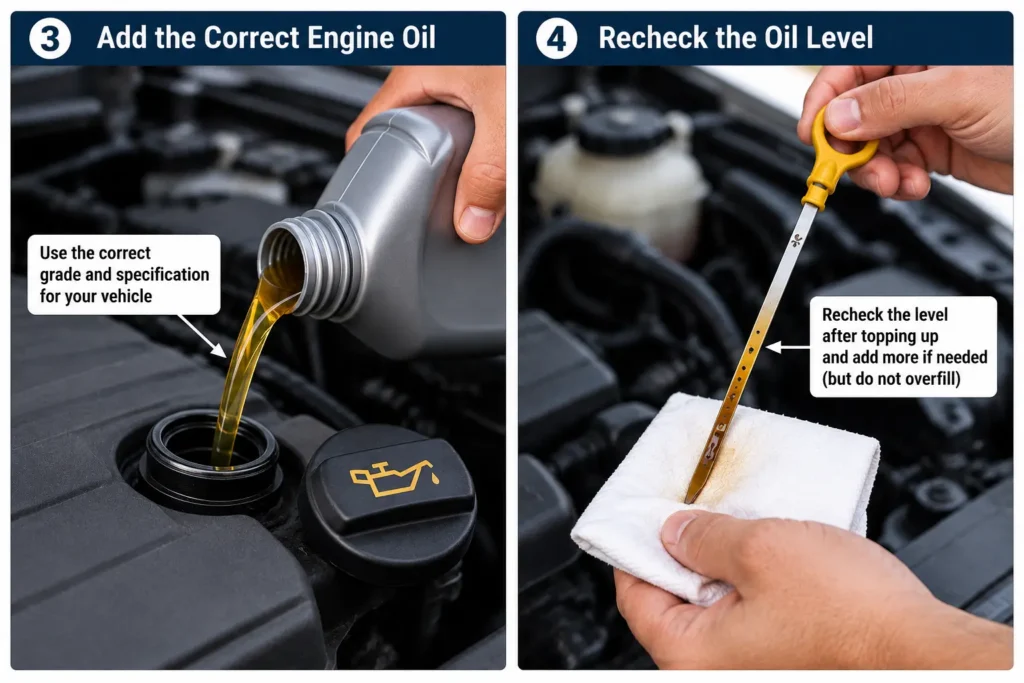
First, confirm the exact oil specification recommended for your engine. Then locate the oil filler cap, which is normally marked with an engine-oil symbol or similar identification.
Follow these steps:
- Remove the oil filler cap.
- Place a clean funnel into the filler opening if possible.
- Add a small amount of the correct engine oil.
- Wait briefly for the oil to drain into the engine.
- Check the dipstick again.
- Repeat only if necessary.
- Stop once the level reaches the manufacturer’s specified range.
- Refit the oil filler cap securely.
Maruti Suzuki’s owner guidance recommends pouring oil slowly, checking the level again after refilling and avoiding overfilling.
The biggest mistake here is treating the engine like an empty bottle. You don’t want to pour in a large quantity simply because the dipstick looked low. Add gradually and measure again.
How Much Engine Oil Should You Add?
There is no universal amount.
The difference between the lower and upper marks varies by engine, and the total oil capacity also varies considerably between vehicles. Your owner’s manual is therefore the correct source for the engine’s oil capacity and recommended specification.
For a low reading, the safest DIY approach is:
- Add a small quantity.
- Allow the oil to settle.
- Check the dipstick.
- Repeat if necessary.
- Never deliberately go above the maximum marking.
This is another reason why keeping a bottle of the correct engine oil in the car can be useful for long journeys, provided it is stored appropriately and is actually the specification recommended for your vehicle.
How Do You Know If the Engine Oil Looks Normal?
The appearance of engine oil can provide useful clues, but colour alone isn’t enough to diagnose an engine problem.
Fresh oil is generally clearer and lighter, while used oil becomes darker as it circulates and collects contaminants. Dark oil therefore does not automatically mean the engine has a serious problem.
Pay more attention to unusual conditions such as:
- A significant change in oil level between checks
- Oil that appears unusually contaminated
- Milky or creamy deposits that persist and are accompanied by other symptoms
- Visible metal particles
- A strong fuel smell
- Fresh oil around the engine or underneath the car
These observations do not automatically identify the cause. If something looks abnormal, especially alongside warning lights, overheating or unusual engine behaviour, the sensible move is to have the car inspected professionally.
What If Your Car Keeps Losing Engine Oil?
If you repeatedly check engine oil and find that the level is dropping, don’t turn topping up into a permanent solution without finding out why.
Possible causes can include:
- External oil leaks
- Normal oil consumption
- Engine wear
- Oil leaks around seals or gaskets
- Problems associated with the engine’s lubrication system
The exact cause requires diagnosis. Hyundai notes that oil consumption can vary with factors including driving habits, climate, traffic conditions and oil quality, which is another reason to monitor the level rather than relying on a single inspection.
If you are repeatedly adding oil between scheduled services, make a note of how frequently you need to top up and have the vehicle checked.
What Does the Oil Pressure Warning Light Mean?
This is an important distinction: an oil pressure warning light is not simply a low-oil-level reminder.
If the oil-pressure warning light comes on while driving, treat it seriously. Hyundai’s current guidance says drivers should move to a safe location, stop the vehicle and check the engine oil level; if the warning remains after adding oil or oil isn’t available, the vehicle should be inspected as soon as possible. Continued driving with low oil pressure can result in severe engine damage.
So don’t wait for the warning light before developing the habit of checking the oil level.
Common Mistakes When Checking Engine Oil
A simple job can still go wrong if you rush it. Avoid these common mistakes:
- Checking on a steep slope: The reading may not accurately represent the oil level.
- Reading the dipstick only once: Clean it, reinsert it fully and take a fresh reading.
- Adding too much oil: Overfilling can be harmful.
- Using the wrong oil: Always follow the vehicle manufacturer’s specification.
- Ignoring repeated oil loss: Frequent top-ups can indicate an underlying problem.
- Touching hot engine components: Give the engine enough time to cool where required and follow the manufacturer’s procedure.
- Spilling oil around the engine: Use a funnel and clean up any spill immediately.
- Assuming all cars use the same procedure: Petrol, diesel, hybrid and different engine designs can have different instructions.
Should You Check Engine Oil Before a Long Drive?
It is a sensible basic check, particularly before a long road trip.
You don’t need to perform a complete service every time you travel. A quick inspection of the engine oil level, tyres, coolant, washer fluid and other basic items can help identify obvious problems before you leave.
For longer journeys, it is also worth checking:
- Tyre pressure and condition
- Engine coolant level
- Windscreen washer fluid
- Lights and indicators
- Battery condition
- Spare wheel or puncture-repair equipment
- Essential emergency equipment
The idea isn’t to turn every road trip into a workshop inspection. It is simply about catching obvious issues while you’re still at home.
Read More: Tata Sierra Legend Series Launched at ₹11.99 Lakh
When Should You Not DIY?
Checking and topping up engine oil is generally a straightforward owner-level task, but that doesn’t mean every oil-related problem should be handled at home.
Seek professional assistance if:
- The oil level keeps dropping rapidly.
- You see a significant oil leak.
- The engine is producing unusual smoke or noise.
- The oil-pressure warning light remains illuminated.
- The oil appears heavily contaminated or abnormal.
- You accidentally overfill the engine significantly.
- You are unsure which oil specification your vehicle requires.
- You suspect an internal engine problem.
DIY maintenance should make ownership easier, not encourage you to take risks with an engine problem you don’t understand.
Frequently Asked Questions
How often should I check engine oil?
There is no single interval that applies to every vehicle. Follow the manufacturer’s maintenance guidance, while checking more frequently if your vehicle has a history of oil consumption or you are preparing for a long journey.
Can I check engine oil when the engine is hot?
The correct procedure varies by vehicle. Some manufacturers specify checking before starting the engine, while others require the engine to reach operating temperature and then specify a waiting period. Always follow your owner’s manual.
Can I add a different engine oil brand?
The important consideration is whether the oil meets the specification and viscosity recommended for your engine. Don’t choose solely by brand name; check the vehicle manufacturer’s requirements first.
What happens if I overfill engine oil?
Overfilling can cause engine problems, which is why manufacturers specifically warn against exceeding the specified level. If you have significantly overfilled the engine, have the excess oil removed rather than continuing to drive normally.
How do I know if my engine oil is low?
The most direct method on vehicles equipped with a conventional dipstick is to check the oil level and compare it with the marked range. Some vehicles may also have electronic oil-level monitoring, but the exact system varies by model.
Can I drive if the oil-pressure warning light comes on?
Don’t continue driving normally with an oil-pressure warning light illuminated. Stop safely, check the oil level according to the manufacturer’s instructions and seek professional assistance if the warning remains.
Ride And Tech Verdict
Knowing how to check engine oil is one of the simplest skills a car owner can learn, and it takes only a few minutes once you know what you’re looking for. The dipstick gives you more than a simple measurement: regular checks can help you notice a falling oil level, possible leaks or unusual changes before they become bigger concerns.
The golden rule is simple: use the oil specified for your engine, check the level using the manufacturer’s procedure, add oil gradually and never assume that more is better. For everything beyond a straightforward top-up — particularly persistent oil loss, warning lights or signs of a mechanical problem — that’s where a proper workshop inspection earns its place.
Ride And Tech — Where Ride Meets Tech.
Drive Smarter. Ride Smarter.
Copyright (c) Ride And Tech. All rights reserved.

1 thought on “How to Check and Top Up Engine Oil Yourself: A DIY Guide”